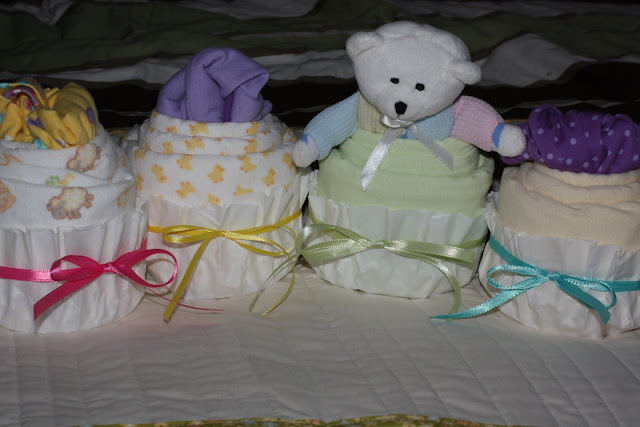
My husband's co-worker and his wife just had their second child and first little girl. We wanted to congratulate them with a little gift. Now I'm definitely all about giving homemade gifts. I think it says something when someone is willing to put in the time to make something for you. And since I do believe time is sometimes money, in my mind homemade should almost always be less expensive. This project is no exception! I got this idea from Little Birdie Secrets.
Supplies:
4 Receiving Blankets
4 Clothing items, toys, or washcloths
4 Large Coffee Filters (8 if you want to double them)
4 Rubber Bands
4 12 inch pieces of ribbon (may be all one color or all different)
1 Windowed Cupcake Bakery Box
Directions:
1. Fold each receiving blanket so that it is about 3 inches wide.
2. If you are using a toy you may skip this step. If you are using clothing or a washcloth place it over a fist and fold the edges into the center. You may also lay it on a flat surface and fold the outsides inward. Be sure to make sure all elastic, buttons, or sleeves are folded to the inside to give the cupcakes a neater look.
3. Wrap the receiving blanket around the toy, washcloth, or piece of clothing starting at the highest point you would like the cupcake and wrapping around and down to create a peaked top.
4. Once the cupcake is wrapped tie it with a rubber band.
5. Place the cupcakes into coffee filters. I used 2 filters per cupcake because they are thin.
6. Tie a piece of ribbon around each cupcake. You may use one color for all the cupcakes or multiple colors. Since my cupcakes were fairly neutral colored, I wanted to add a little more color so I went with 4 different colored pieces of ribbon.
7. Place your finished cupcakes in the bakery box. The smallest box available at the store where I purchased my cupcake box was 12"x12". This was too large for 4 cupcakes so I used tape at the bottom of the coffee filters to secure the cupcakes to the box and keep them from shifting in transit. You could also make more than 4 cupcakes to fill up the box if you'd like.
Cost Breakdown:
Pack of 5 receiving blankets - $2 clearance
Onesie & short outfit (separated to make 2 cupcakes) - $1 clearance
Pair of shorts - $1 clearance
Windowed Cupcake Box - $2
All other supplies came from my crafting supplies.
Total: $6


